How to bulk change a billing method on reservations
When a reservation's billing plan changes, or pending reservations need to be finished , you don’t have to open each reservation one at a time. The Edit Reservations grid inside Bulk Reservations lets you change the billing method for several reservations at once, then confirm them all together. It works on both pending and complete reservations, so you can use it to finish new bookings or to move existing ones to a different billing method.
STEP 1: Open Bulk Reservations
From inside your event, open the Manage menu in the top navigation bar and click Bulk Reservations, listed under Advanced.
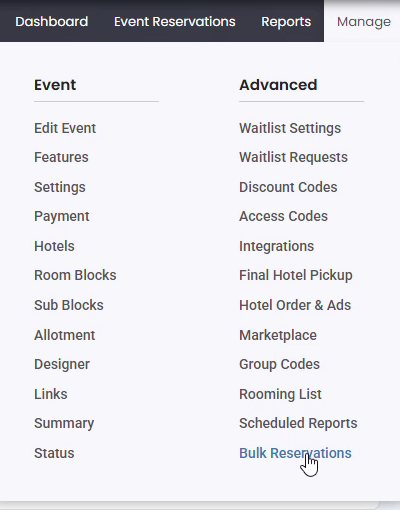
Bulk Reservations is the last item in the Advanced column of the Manage menu.
STEP 2: Open Edit Reservations
The Bulk Reservations page shows four options. Find the Edit Reservations card and click its Edit button. This opens a grid listing every reservation on the event, both complete and pending.
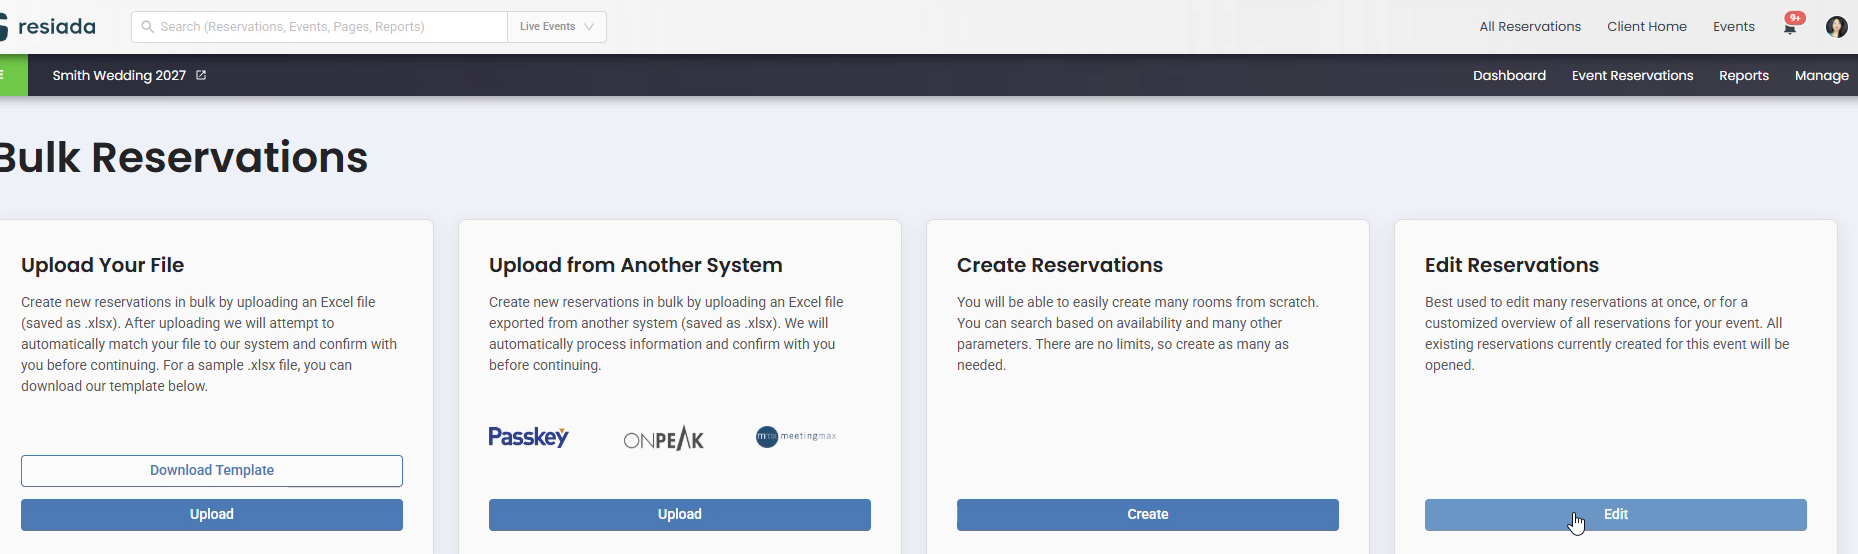
Edit Reservations is the right-hand card. Its Edit button opens the reservation grid.
STEP 3: Select the reservations to change
Check the box at the start of each reservation row you want to update. As you select rows, a counter in the top left shows how many rooms are selected, and the Cancel, Select Group, and Update Fields buttons become active.
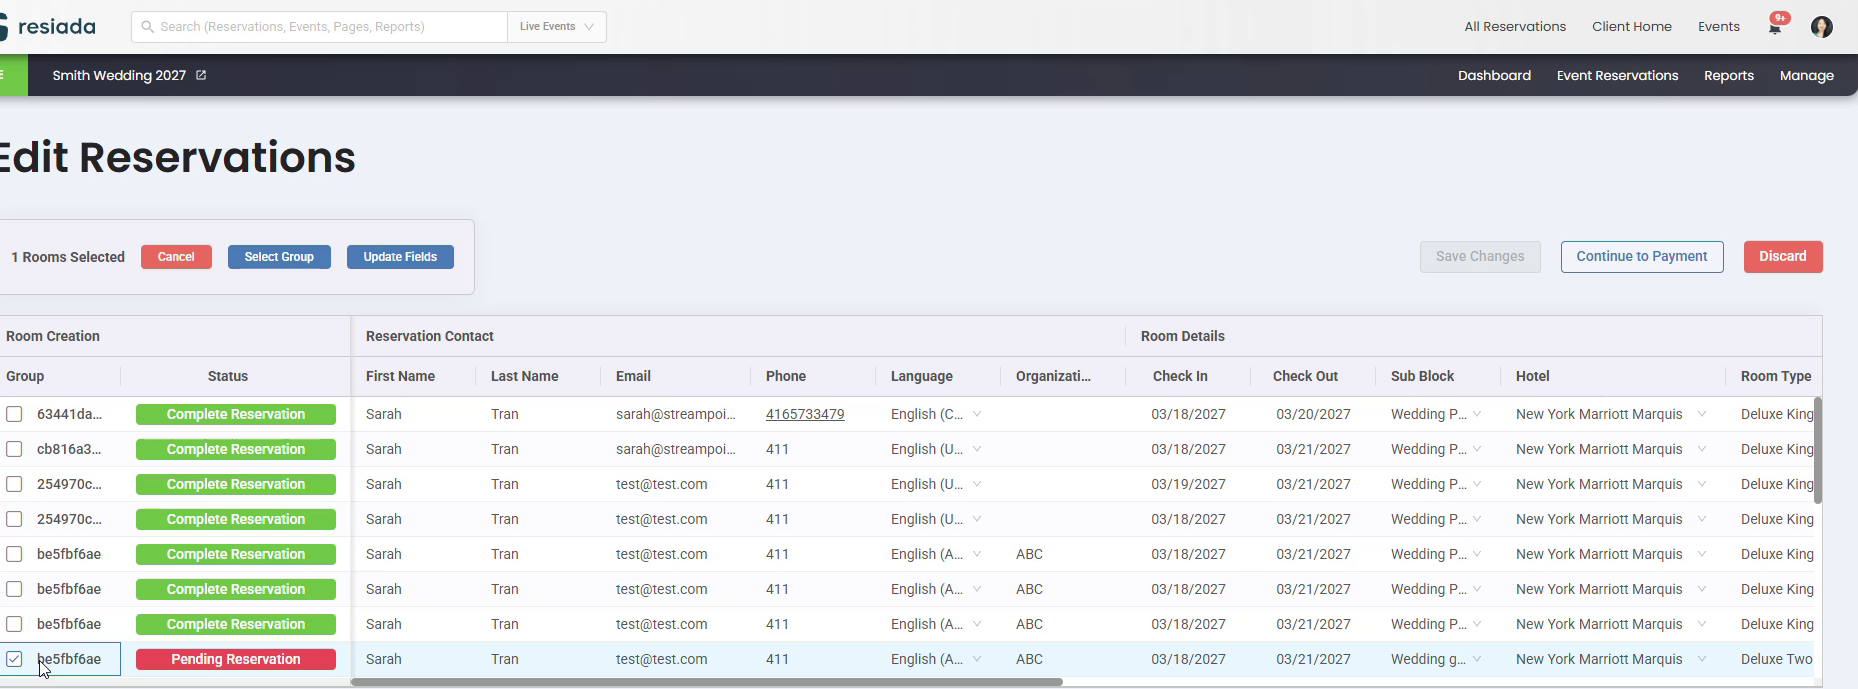
Each checked row is highlighted, and the counter above the grid updates as you go.
STEP 4: Change the Payment column
Scroll the grid to the right until you reach the Payment column. For each selected reservation, click its Payment cell and choose the new billing method from the dropdown: Credit Card, Bill To Master, or Hold Until Hotel Closing Date.
Once every selected row shows its new billing method, click Continue to Payment at the top right. Your changes are saved as the next page loads.
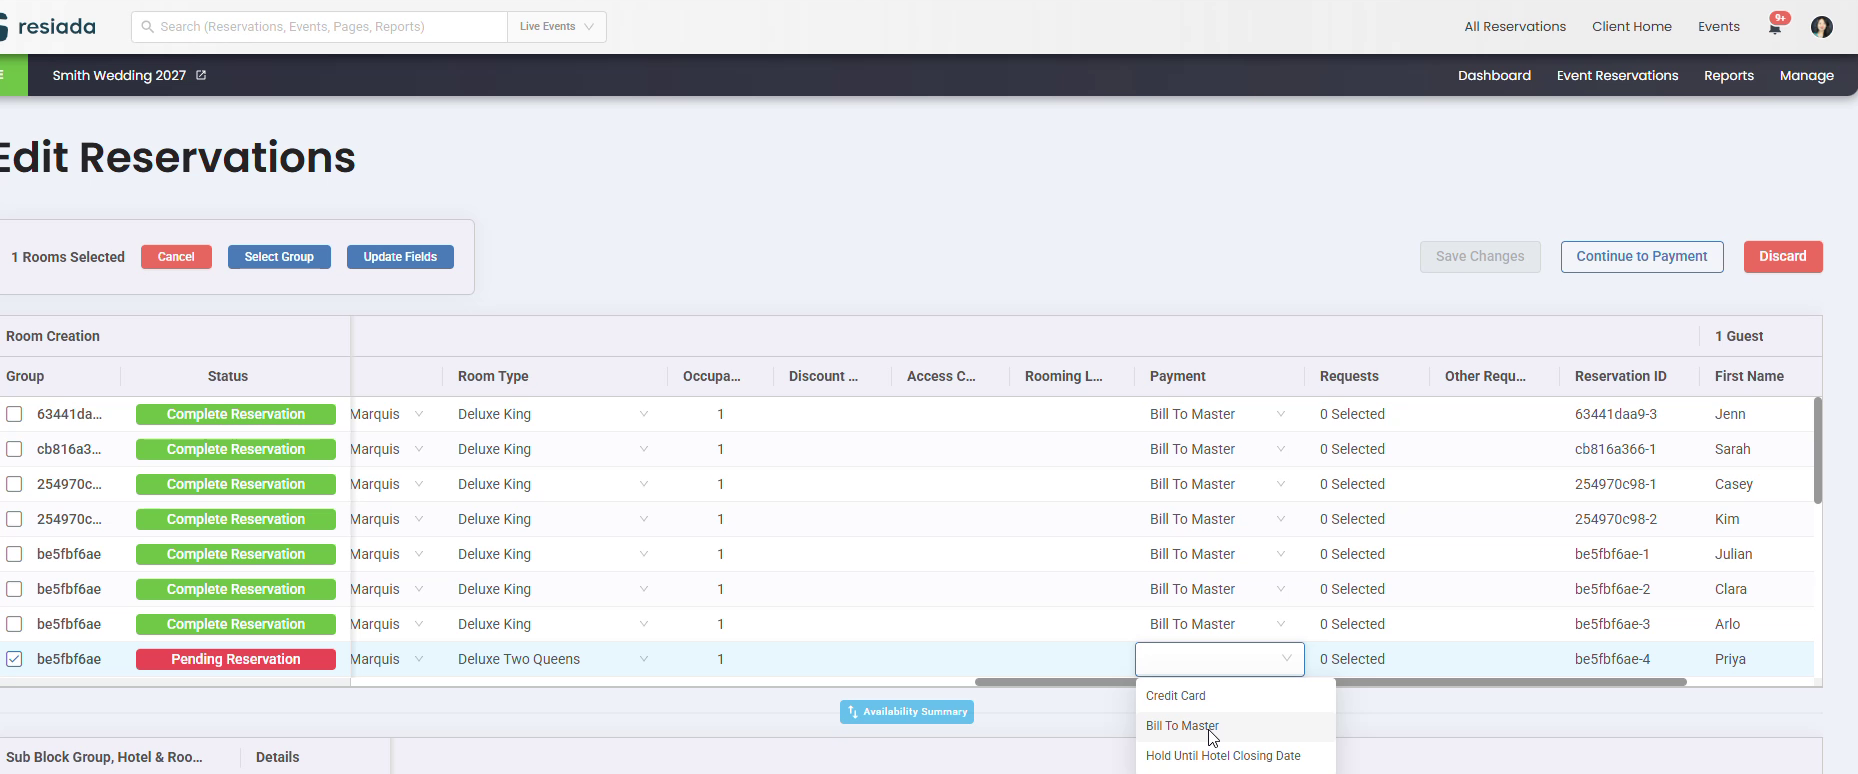
The Payment dropdown on a selected row, showing the three available billing methods.
|
GOOD TO KNOW The Update Fields button applies a value to all selected rows at once, but billing method is not one of the fields it can update. Change billing method directly in each row’s Payment cell as shown above. Update Fields is still handy for other reservation details. |
STEP 5: Review the Complete Reservations page
The Complete Reservations page lists the reservations you changed, with the subtotal, taxes and fees, total, amount due now, and amount due at hotel for each. The steps below cover Bill To Master, the method shown in this walkthrough.
In the Type column under Select Payment, click Select Bill To Master on any row, then click Add/Manage Bill To Master.
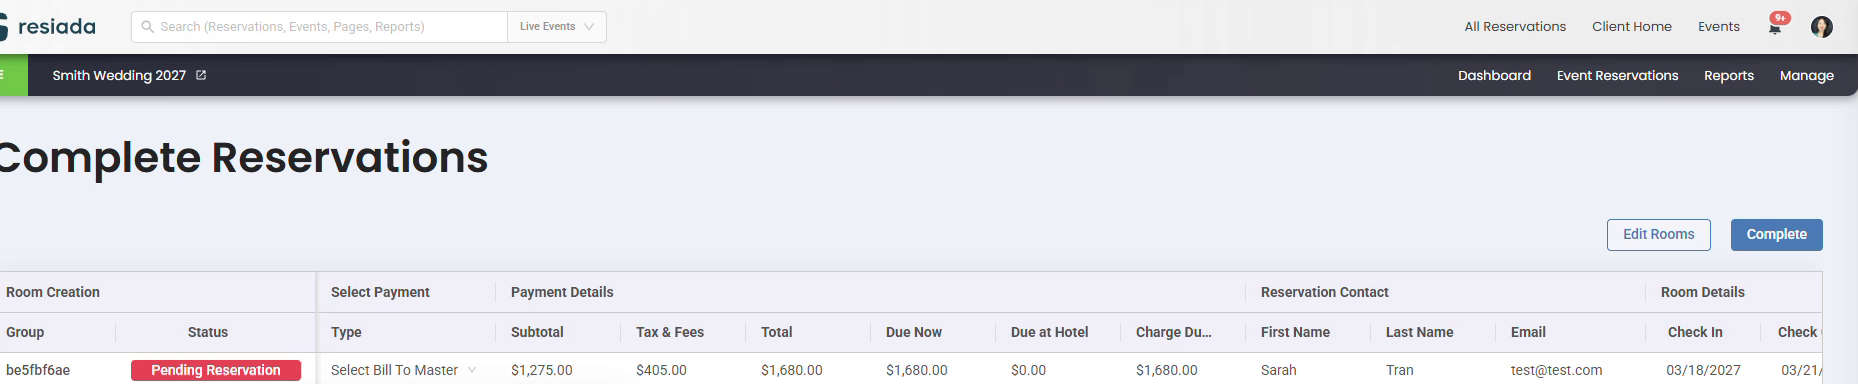
Clicking a row’s Type cell reveals the Add/Manage Bill To Master button.
STEP 6: Choose the master bill account
A Bill To Master panel opens on the right. Choose the account from the Master Bill dropdown (this field is required). The dropdown lists the master bill accounts already set up for your event.
To use the same account for every reservation in this batch, check Apply this account to all Bill to Master rooms in this batch without an account selected. This saves you from repeating the selection row by row. Then click Add at the bottom of the panel.
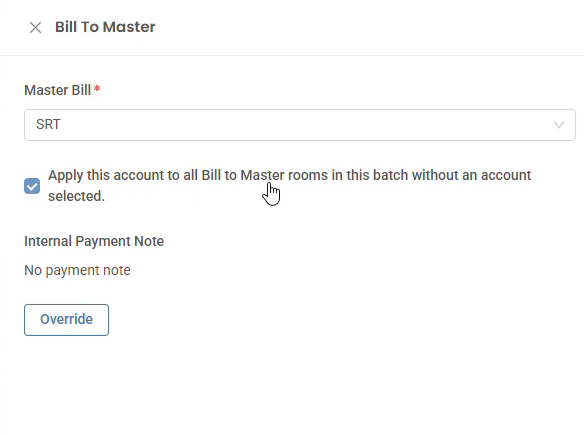
The Bill To Master panel with an account chosen and the apply-to-all checkbox turned on. The Add button sits at the bottom of the panel.
Back on the Complete Reservations page, each row’s Type column now shows the master bill account you chose.
STEP 7: Complete the reservations
Click Complete at the top right. Resiada processes each reservation and returns you to the Edit Reservations grid, where the updated reservations show a Complete Reservation status.
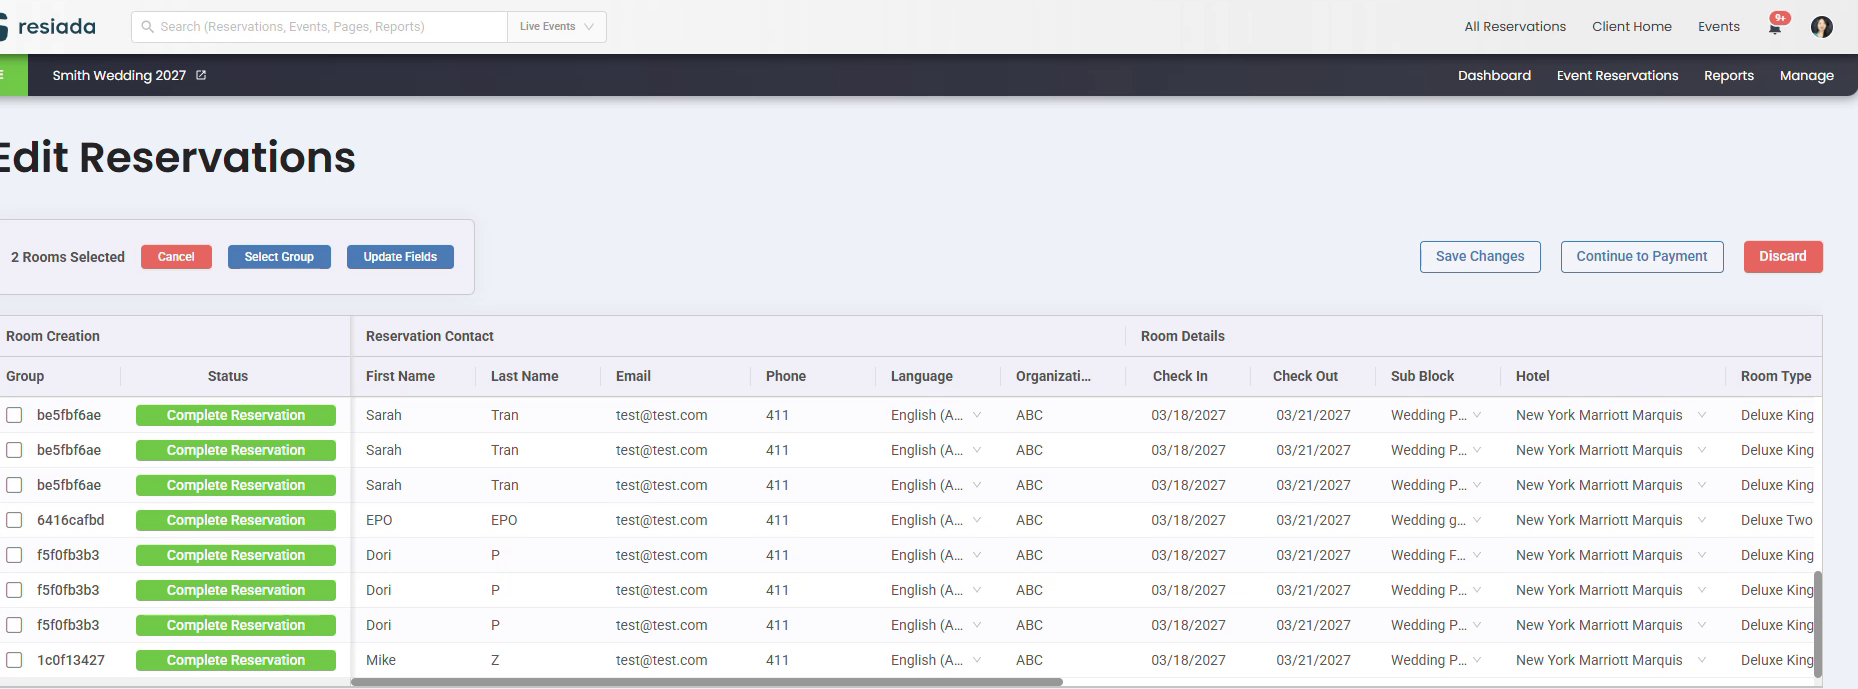
After completing, the updated reservations show Complete Reservation in the grid.